

Epi Info™ User Guide - Companion for Android
 ShareCompartir
Epi Info™ User Guide
Collecting & Analyzing Data on an Android Device
Configuring Cloud Synchronization with Windows Azure
The companion for Android application allows you to synchronize with a Windows Azure cloud service and consume the data using Epi Info™ Companion for Android to allow a team of epidemiologists to more efficiently collect data together. Data can be collected offline and synchronized with team members when Internet connectivity becomes available. If you are always connected, data shows up in the cloud instantly to allow for real-time data analysis and situational awareness.
You will need to first create a Windows Azure account at Windows Azure Home. The free tier is sufficient for many data collection activities. Please note that you MUST get organizational approval first if you are using this service for official purposes!
Please complete the steps documented below in order to set up your Companion for Android application with Windows Azure.
- Add a Mobile Service
- Configure Applications to Use Settings
- Receive Data/Create Data Table in Windows Azure
Add a Mobile Service
- Select the Create a New Mobile Service option.
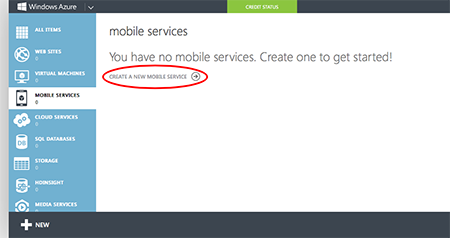
Figure 6.35: Create a New Mobile Service
- Provide a unique Mobile Service Name. You will need to either remember (or copy) the Mobile Service Name and provide it in the configuration settings of the application.
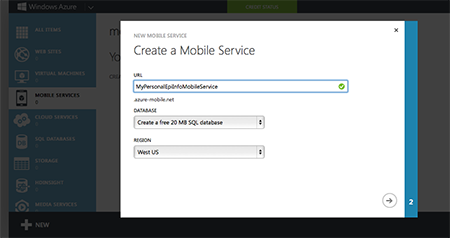
Figure 6.36: Mobile Service Name
- Create an SQL Server database. Specify a database name, Login Name, and Password.
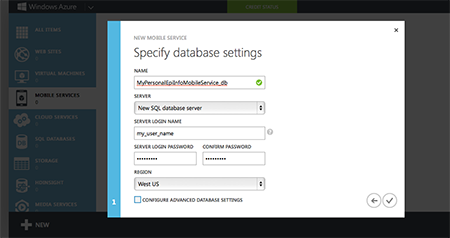
Figure 6.37: Database Settings
- Once completed, click on the Mobile Service Name.
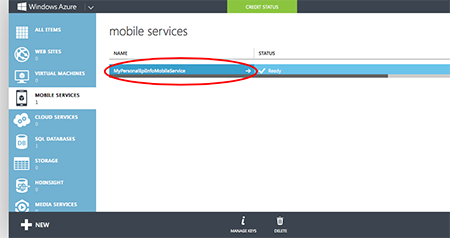
Figure 6.38: Accessing Mobile Service Configuration
- Click on the Manage Access Keys link. You will need to copy this Application Key into the Companion for Android configuration settings in order to authenticate against your service.
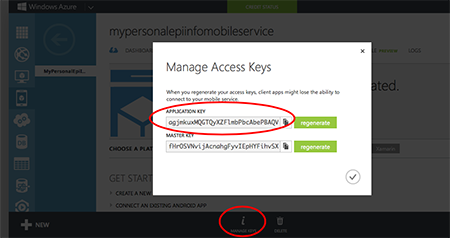
Figure 6.39: Managing Access Keys link
Configuring the Application to Use the Settings
- From the Companion for Android main menu, click on the Settings option.
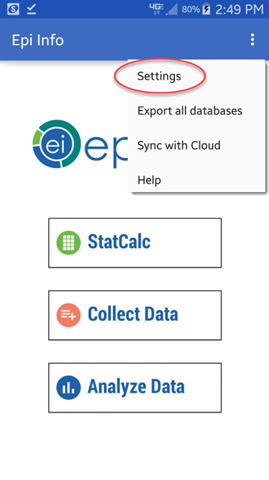
Figure 6.40: Companion for Android Configuration Settings
- Provide the Windows Azure mobile service name to use for data synchronization in the Azure mobile service section. Also, provide the Windows Azure application key to use for data synchronization in the Azure application key section.
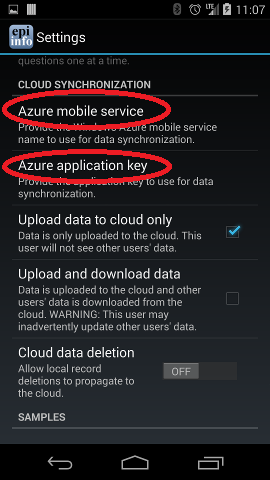
Figure 6.41: Specify mobile service name
Receiving Data and Creating a Data Table in Windows Azure
The last step required in order to synchronize data between the device and the cloud would consist of creating a data table in the cloud. In order to do so, please complete the following steps:
- Login into your Windows Azure account.
- Click on Mobile Services.
- Click on the corresponding mobile service.
- Click on Data.
- Click on Create (located at the bottom of the screen).
- Provide a table name. Please Note that this Table Name must exactly match the corresponding Form Name in the Companion for Android application.
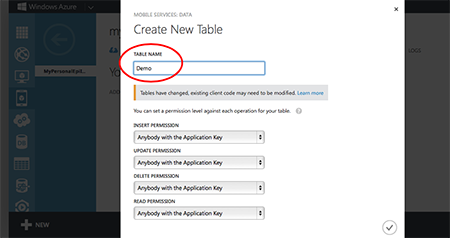
Figure 6.42: Create data table in cloud service
- Click on the check mark icon to complete the table creation process.
At this point, you should be able to start entering data into your android device and synchronizing data using the Sync with Cloud option of the Collect data module.
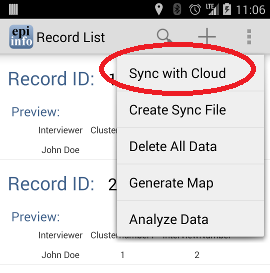
Figure 6.43: Synchronize data with cloud
- Page last reviewed: June 27, 2017
- Page last updated: June 27, 2017
- Content source: