

How to Download the Data
 ShareCompartir
Data can be downloaded as either a GIS file (shapefile or file geodatabase) or a table.
Download as a GIS File
Step 1
Choose the map area and data from the left navigation bar to display a map, then open the “Download GIS Data” tool located in the toolbar at the top of the map.

Step 2
Customize the Export Layer Name and choose the Output Format. The file will be downloaded as a .zip file.
Note: Data values within the table of “-1” or “-9999” indicate “Insufficient Data.”
Download as a Table
Follow these six steps to download data in a table.
Step 1
To export the data, click on the “Report/Export” button (magnifying glass) in the toolbar at the top of the map.
Step 2
Select the area for which you are interested in downloading data. Data can be selected by location or by search. If you want to download data for the entire United States and territories, do not make a selection, continue to the next step.
- To select data by location, choose a selection tool:
- Select by polygon—click a point on the map to add a vertex to the polygon; double-click to finish selection.
- Select by rectangle.
- Select by circle.
- Select by point—can be used to select one area or add an additional area to a selection group made with another tool.
- Deselect by point—deletes an area from the selection group.
- Clear selection.
- For polygon, rectangle, or circle selection tools, “Select Method” determines how the tool functions.
- Partially inside the area drawn—selects an area either within the selection tool boundary or overlapping the tool boundary.
- Inside the area drawn—selects an area located completely within the selection tool boundary.
- To select data by search, enter a state or county name in the search bar. You can enter multiple counties, but must search for them one at a time.
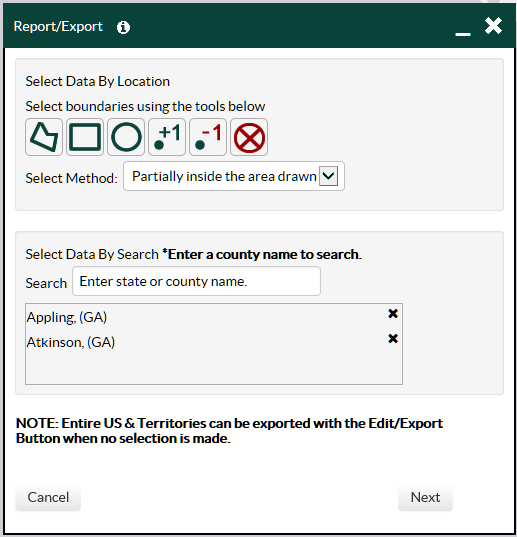
Step 3
Click the “Next” button to continue.
Step 4
Add additional data to your exported table by expanding and selecting additional data in the data menu.
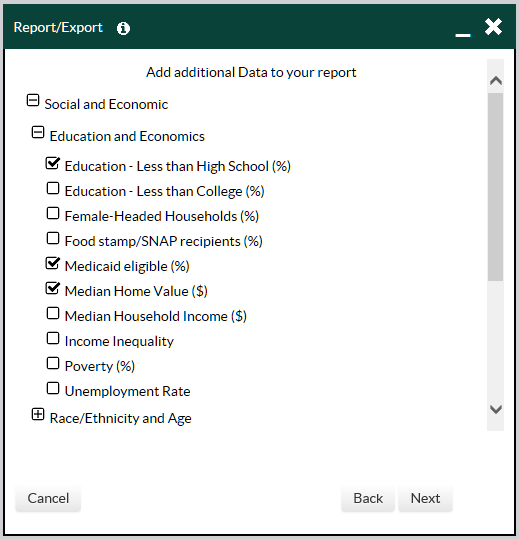
Step 5
Click the “Next” button to continue.
Step 6
Click the “Export Data” button and, when prompted, save the resulting file “report.csv.” To keep the leading zeros in the FIPs codes, use Excel’s Text Import Wizard to open the file in Excel.
- Open a blank Excel workbook.
- Click the “Data” tab.
- Click the “From Text” icon. Use the file manager to locate the CSV file you saved above and click the “Import” button.
- Click the “Delimited” radio button in the Text Import Wizard. Check the “My data has headers” box. Click the “Next” button.
- Check the box next to “Comma” for delimiters and Uncheck all other boxes. Click the “Next” button.
- Select the column that contains the FIPS codes. Click the “Text” radio button to select it. Click the “Finish” button.
- Click the “OK” button in the “Input Data” dialog box.
- Page last reviewed: July 24, 2017
- Page last updated: July 24, 2017
- Content source: